Don't blow a gasket while on holiday
The road trip is one of life's greatest pleasures. You pick a destination (or you don't), grab a map (or not), pack a few clothes and some snacks (or the snacks, at least), and just get in the car and go. Pretty simple.
Now, it's not that we want to put the brakes on your holiday fun, but you actually shouldn't just get in the car and go. Since a road trip only works as well as your vehicle, an inspection is in order before heading out – one you can do yourself, in your own garage.
When he was a kid, that kind of thing fell to Mike Morris (Automotive Service Technician '04), whose dad would have him change spark plugs on the family Oldsmobile before heading out on vacation.
"Everyone said, ‘Mike, you're going to be a mechanic,'" says Morris, who always showed a natural aptitude for the field, even if he ultimately arrived at it following a stint in forestry and then police work.
Not all of us are as mechanically inclined, but he's certain we're capable of following the checklist he outlines below. Budget for about an hour and a bit of cash for parts and supplies, but bank on a safer, more efficient journey, wherever the road may take you.
1. Check those fluids
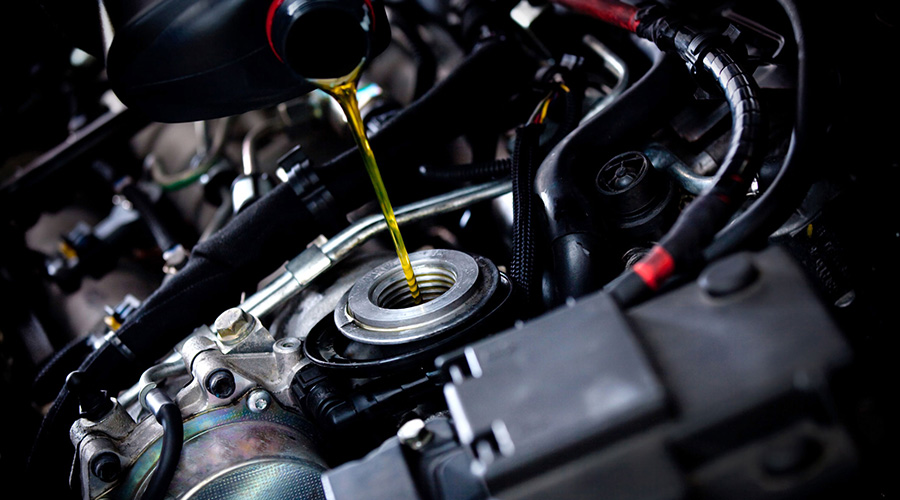
It's hard to name one fluid as most important to the operation of your vehicle, but "one of the life-bloods of your car is oil," says Morris.
Wipe the dipstick, reinsert it then make sure there's oil in the cross-hatched area. If it's black, it's dirty and needs changing. Add oil through a separate filler. The proper grade is labelled on the cap.
Coolant circulates throughout the radiator and engine. If you need to add any, "never open it when it's hot. Coolant is under presure," warns Morris. "Check it before you start the vehicle."
Transmission fluid (automatics only), in contrast, needs to be checked when the vehicle is idling on a level surface (be sure the vehicle is turned off for every other part of your inspection). Check it like you would oil, but add fluid, if necessary, through the dipstick tube.
Check the brake fluid as well, but never open the reservoir, as the liquid quickly absorbs water vapour and becomes ineffective. "As long as you're above the minimum mark, you'll be okay," says Morris.
2. Inspect belts and hoses
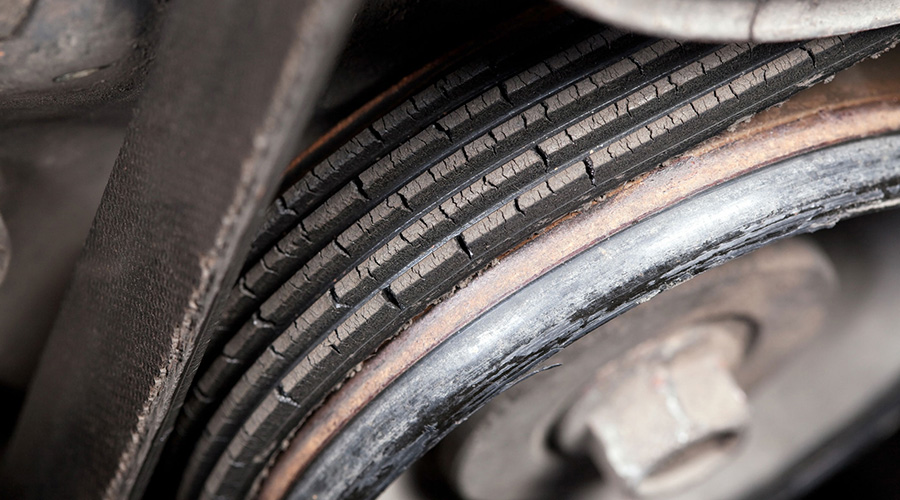
"I don't expect everyone to do a full mechanic's inspection," says Morris, "but look for things like splits, leakage and contamination with oil."
First, check your owner's manual for a replacement schedule and make sure you're not overdue. Combine that with a visual and tactile inspection, looking for cracks or splitting along fluid hoses.
On newer cars, a single serpentine belt turns all moving parts (e.g., alternator, water pump, air conditioning, power steering, etc.).
Check it for fraying, glazing or slack by firmly tugging it. Also look for contamination with oil. "Before you replace it," says Morris, "find out why it's contaminated."
3. Check the air filter
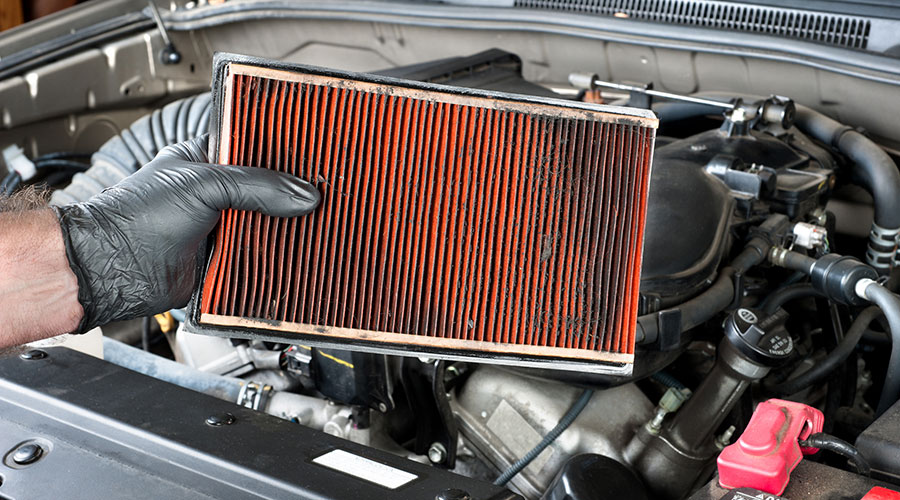
Morris uses a clever trick to check the efficacy of an air filter. After removing it, "I take a trouble light and put it inside to see if light shines through." If not, it's too full of dust and needs replacing.
To cool the engine, air also needs to pass through the fins of the radiator at the front of the engine as you drive. Ensure those fins aren't folded – creating a hot spot and uneven engine cooling – and consider spraying them clear of debris, from the engine side out, at the car wash.
Also, take off the fancy guard you put on the front to deflect cold winter air, Morris adds. "It might be cool and shiny, but [removing] it makes a big difference."
4. Pump up the tire pressure

"Tire pressure makes a big difference to your mileage," says Morris. The wall of a tire bends as you drive, especially when underinflated. "The more it does that, the more heat builds up, the more energy is lost."
Get a pressure gauge. For the most accurate reading, apply it to the valve and hold it in place. Use the nub on the opposite side of the head to deflate the tire slightly if necessary.
The trick is not to inflate to the pressure recommended on the side of the tire. For the proper level, refer to the sticker on the inside of the driver-side door. "That's what you fill your tires to," says Morris. "Your vehicle dictates that."
5. What about window wipers?
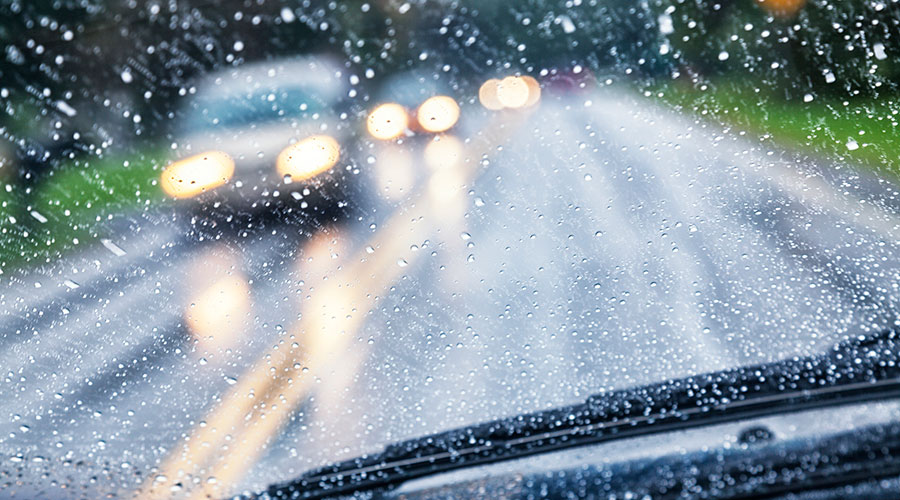
If you can't see the fluid through the reservoir walls, open the cap and look inside for a plastic float. Its position relative to the top of the tank will tell you whether you need to add windshield washer fluid.
Your wiper blades should make full contact with your windshield. If not, there are a lot of choices for replacements, which vary in size, construction and material.
A good parts store can provide new ones specific to the model and year of your vehicle. Your manual will show you how to make the switch.
Hit the road!
Overall, be mindful of how your car works (and more informed by reading the owner's manual) but "try not to get paranoid" about its performance, says Morris. Make sure you've got your cellphone, charger and an inflated spare, and visit a licensed mechanic for anything you're unsure about. Otherwise, with your inspection done, get back to enjoying the summer and whatever the road trip has in store.
"It's an adventure," says Morris. "Positive thinking has a lot to do with it."